At least twice a year, you should perform a “tech checkup” on your Windows computer, to make sure everything is running right.
Don’t bother calling the Nerd Squad….
This is something you can do, fairly easily, by yourself, for free.
Read on, to learn how
Table of Contents
Run Disk Cleanup
Temp files slow the system down tremendously, and Windows 7/8 has an easy way to clean them up.
For Windows XP, it’s a bit trickier, but we’ll cover that, too.
Disk Cleanup, Windows 7 / Windows 8
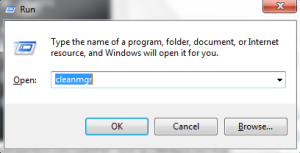
- Get to the “Run” box by pressing Windows+R
- In the Run box, type “cleanmgr”, and click “OK”
- Select the Drive, where cleanup will be run (usually, C: drive), and click “OK”

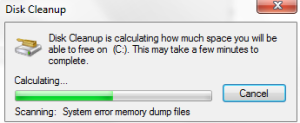
- Cleanup manager will briefly scan the drive….
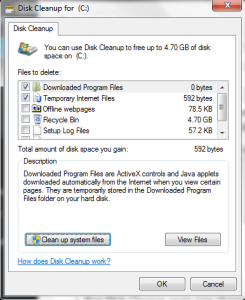
- Select the following options, and click “OK” (Scroll down, to see them all)
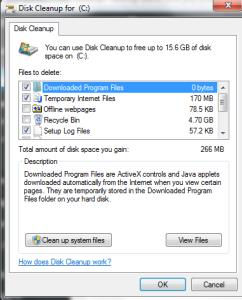
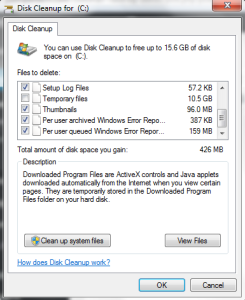
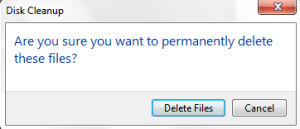
- At the prompt, click “Delete Files”
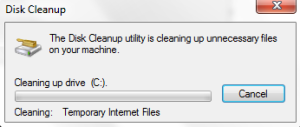
- The cleanup will proceed, and the program will exit when complete. Normally, this will only take a few minutes, but might run for a while if it hasn’t been done in a while.
Clean Up System FIles
- Run Disk Cleanup again (see above)
- At the “Disk Cleanup” screen, click “Clean up system files”
- As before, select the drive to clean up (usually C: drive)
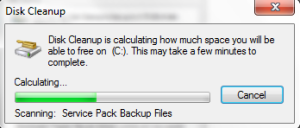
- Disk Cleanup will scan the drive (This might take a while!)
- Select the options as listed in the pictures below, and click “OK” (Be sure to scroll down!)
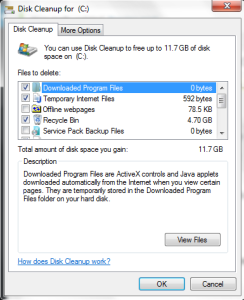
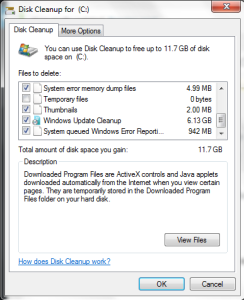
- At the prompt, click “Permanently Delete Files”

- Disk Cleanup will continue to run, and then exit automatically when complete. If this hasn’t been run in a while, it could take a while to run.

If you don’t have Windows XP, skip to the next section
Disk Cleanup, Windows XP
- Click Start…Run, or press Windows+R to get the Run box
- In the run box, type “cleanmgr”, and click “OK”
- Disk Cleanup will perform some analysis. If disk cleanup hasn’t been run in a while, this might take a while.
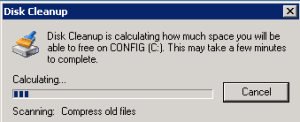
- Select the following options. BE SURE NOT TO SELECT COMPRESS OLD FILES. Note: Scroll down to view all options. Click “OK” to continue.
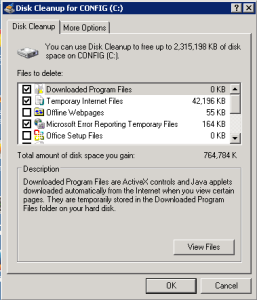
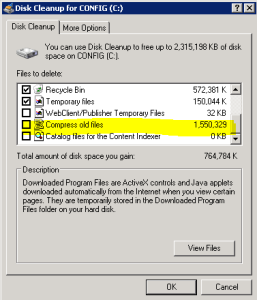
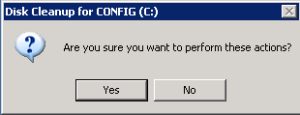
- At the prompt, “Are you sure you want to perform these actions?”, click “YES”
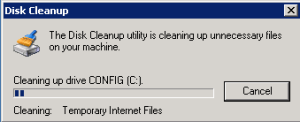
- Disk Cleanup will run, and then automatically exit when complete. This might run for a while, if it hasn’t been run in a while.
Windows XP, Delete Windows Update Undo Files
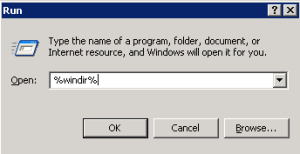
- Go to the RUN dialog, then type “%windir%”, and click OK
- Select all files within the WINDOWS folder that begin with a $ (dollar sign):

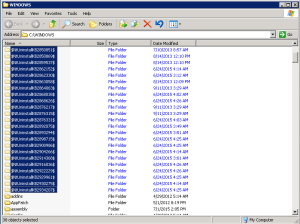
- Press SHIFT+DEL, then answer “YES” to delete all files

- The files will be removed.
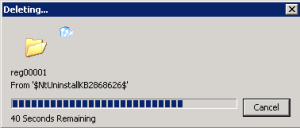
Windows XP, Delete Temp Files
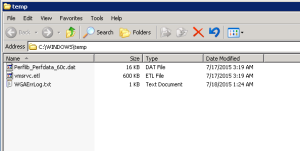
- Go to the RUN dialog, and type “%WINDIR%\temp”, and click “OK”

- Select all files in the WINDOWS\TEMP folder (CTRL+A), then press SHIFT+DEL to delete them all. When prompted, click “YES”.
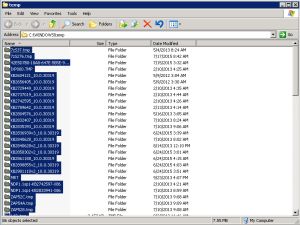
- During the delete process, some files might be in use.

- If so, click OK, then CTRL+CLICK the file in use to DEselect it, then delete all files again.
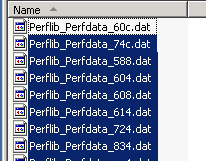
- Repeat, etc…
Windows XP, Delete System Profile Temp FIles
- Repeat the process above, for “%WINDIR%\System32\Config\SystemProfile\Local Settings\Temp”This looks intimidating, but if you start with “%WINDIR%\System32\Config”, you can browse to the correct folder from there.
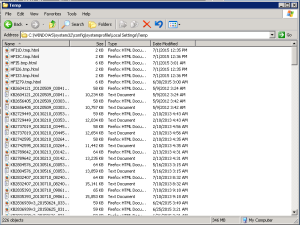
- Delete all files
Check for Malware and Viruses
Note: This will take a while… be prepared to run this overnight, or longer
Run Microsoft Malicious Software Removal Tool (MRT)
- Press Windows+R to get the “Run…” box
- Type “mrt” and press Enter
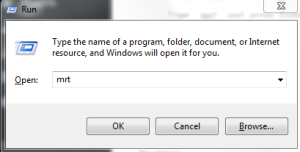
- Click “YES” to the UAC prompt: “Do you wish to allow the following program to make changes to your computer?”
- In MRT, click “Next” at the first screen.
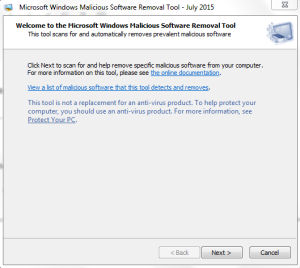
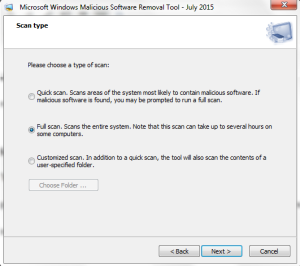
- On the next screen, select “Full Scan“, then click “Next”
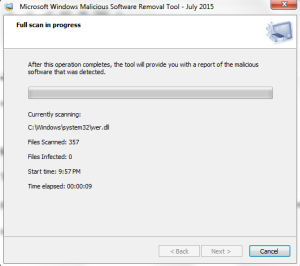
- At this point, the scan will continue to run, which might take several hours.
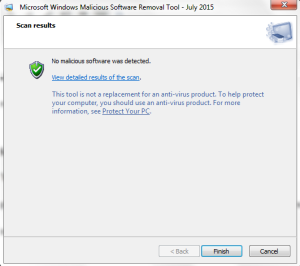
- Once complete, if any malicious software is found, it will be indicated on the final screen. If not, a message will be displayed, indicating “No malicious software was detected.”
Install Windows Updates and Optional Updates
Microsoft will automatically install important and critical updates, but “optional” not be installed automatically, but contribute to system stability and performance.
- Go to Control Panel.
- Windows 7…. Start…Control Panel
- Windows 8….Press Windows+R…type “control”, click “OK”. Or just wish for it. As I understand it, Windows 8 will ‘magically’ anticipate your need for control panel, and it will automatically pop up. REALLY concentrate. Or, not. If that doesn’t work, try waving your hands around, or maniacally scrolling your mouse around. I’m sure that will work. If not, consult Google, who seems to be a better authority on Microsoft products, than Microsoft.
- In Control Panel, Click “System and Security”
- Click”Windows Update”
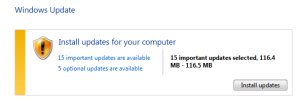
- Click “Optional Updates”. Avoid global updates such as “Bing Desktop” or “Skype” unless you use these components already. Focus on general Windows updates, such as drivers, and “stability” updates.
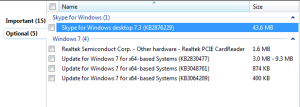
- Select the appropriate updates, then select “Install Updates”
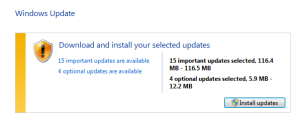
- The updates will download, then install, at which point, you will probably need to reboot.

This is also a good way to make sure the automatic update process is working properly. If the screen displays a red warning, that’s an indication that a specific update failed to install, and you might need to perform some troubleshooting, or take it to someone, in order for them to fix it.
Troubleshooting Windows Update issues IS NOT TRIVIAL, so if you have Windows Update errors, you might want to enlist the help of your technical friend or relative.
Update Virus Protection
I recommend McAfee, if you can afford a paid solution, or AVG Free (the free version of AVG) if you can’t.
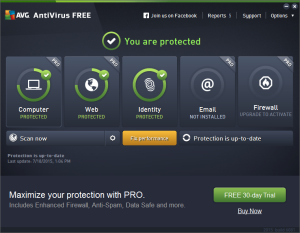
Regardless of what you’re running, open your antivirus console, and make sure your virus definitions are up to date. This will typically be reflected by both a version number, as well as a date.
If your definitions are not up to date, force an update. If the update fails, contact your virus protection provider.
In the example below using the free version of AVG, the console indicates that protection is up to date, and shows a current date and time for the most recent update.
Update Video Driver
Especially if you’re a gamer, keeping the video driver up to date is important.
Look for a system tray icon such as nVIDIA or ATI.
Open your video driver console, then check to make sure the drivers are up to date (each provider is a little different)
Optional: Defrag
As a quick refresher, for those not familiar with “defrag”, it stands for “defragment”. Running defrag on your hard drive moves sectors of data that are used together, physically close to each other, so that the hard drive doesn’t have to work as hard (and thus reads the data together, faster).
Do not ever defragment an SSD (Solid State Disk)
SSD is like a memory stick, and is not substantially affected by fragmentation, but more important, each sector of an SSD can only be written a fixed number of times before it wears out. Defrag essentially writes to every sector on the drive, which is really bad for an SSD.
How do you know if you have an SSD? This is a more expensive feature, normally sold in Chromebooks, that don’t require a large storage option, or gaming laptops that require better performance. The manufacturer would specifically call this out as a special feature when describing the laptop.
A good rule of thumb: If you don’t know whether you have an SSD or not, you probably don’t have one.
For that matter, Don’t ever defragment a USB stick or SD memory card, for the same reason.
Assuming you have a regular hard drive, and are ready to proceed:
- Run “dfrgui” (Defrag)
- Defrag C:
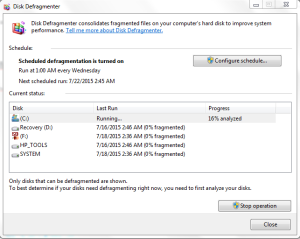
At this point, Defrag will perform and analysis, and if needed, it will continue to defragment the drive. When complete, “Running” underneath “Last Run” will change to the completion date and time.
If this hasn’t been run in a while, it might need a few hours, and possibly overnight, in order to complete.
In Windows 7 and 8, Defrag should be set to automatically run on a schedule, but it might be set to a time where the PC is turned off, or suspended.
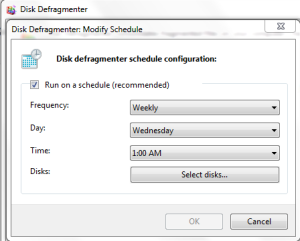
Clicking the “Configure Schedule” button allows you to pick the day, time of day, and frequency that it runs automatically. Try to pick a time that you know you won’t be busy, but that the PC will probably be turned on.
Other Best Practices
Here are some additional best practices that you can follow on a day-to-day basis, to keep your PC healthy and running well.
Uninstall Useless Software
- Launch Control panel
- Click “Uninstall a program”
Refer to this list, from my earlier post:
Uninstall Bloatware / Crapware
Uninstall Java if you don’t use it.
Most people don’t need Java. If you uninstall it, and something you use stops working, simply reinstall Java.
- No more weekly “Java Update” popups, that invariably fail when you click on them, so that you’re left being taunted by an orange icon, staring at you accusingly, as it regularly reminds you that “a Java Update is available!”
- Java ALWAYS runs. It always sits in the background, waiting until you need it. If you never use it, Java is pointlessly consuming memory and CPU resources that could be better spent doing something else.
- When installing Java, the first screen says “Installed on billions of devices worldwide”. The very next screen asks you to install “Ask Toolbar”. So…. I guess there are “billions of devices” running “Ask” crapware.
Speaking of which…Uninstall ‘Ask’ and other Toolbars
Make sure you uninstall Ask Toolbar. It has no value.
Uninstall anything that says “toolbar” or “helper”. You don’t need them.
Use Google Chrome, and Uninstall Adobe Flash, AIR, and Reader
Google Chrome has built-in versions of Adobe Flash and Reader. If you use Chrome, you don’t need to install the “bloatware” versions of these from Adobe, that are laced with junkware, and are vulnerable to exploits.
If you go this route, download and install Chrome, then make sure you can get to everything you need, and that everything works properly.
Uninstall:
- Adobe Acrobat Reader (or Adobe Reader)
- Adobe AIR
- Adobe Flash
Check to make sure everything still works properly — if not, try reinstalling Chrome
Recently, Flash has started bundling McAfee Security Scan Plus. This is not a full version of McAfee, and I DO RECOMMEND THE FULL VERSION, but “Security Scan Plus” is just a waste of space and effort, and it’s basically nagware, to get you to buy the full version of McAfee.
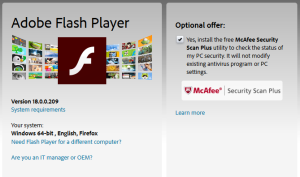
If you’ve accidentally installed it, UNINSTALL “McAfee Security Scan Plus”.
Don’t Use Internet Explorer
Internet Explorer = Virus
It’s that simple. Just delete the blue “e” icon, and pretend it never existed.
Use Google Chrome or Firefox instead.
If you have specific websites that won’t run in Chrome or Firefox, use Internet Explorer JUST for those websites.
I’ve removed access to Internet Explorer (even through the “Guest” profile), and instituted a “No Internet Explorer” policy in my house. I have had ZERO VIRUSES since 2009, and minimal unwanted software.
The problem with Internet Explorer is that it readily accepts new software, or simply prompts the user, who has no idea what to do, so they just click “OK”. So the user goes to an infected website, clicks “OK”, BAM, VIRUS!
Chrome and Firefox both do a much better job of ensuring that malicious programs are detected “in the cloud”, and give clear warnings about infected or potentially malicious websites.
Chrome also employs a type of isolation that prevents a malicious Chrome plugin from gaining access to the operating system, which means you’re much better protected.
Reboot Once a Week
It’s convenient to have a laptop or desktop “ready and waiting” for when you need it, so maybe you leave it on all the time. Or, perhaps you allow the hardware to go to “sleep” when you’re done using it.
In either case, the operating system continues to run until you perform a “full shutdown” or a “full restart”.
In sleep mode, the system turns off the monitor, the hard drive, and other power-consuming components, and puts the CPU in to an ultra-low-power “sleep” mode, while using a tiny amount of electricity to maintain the memory state. When the computer “wakes up”, it starts the internal fan, spins up the hard drive, turns on the monitor and other components, and then puts the CPU in to a normal state, where the operating system basically continues from where it left off, similar to suspended animation.
Windows 8 introduced the “hybrid” restart, where the CPU and memory states are saved to disk during shutdown, and then subsequently loaded during the boot process. This bypasses the operating system’s normal boot process, and, like “sleep” mode, the OS picks up right where it left off.
With a “full” restart, the operating system attempts to cleanly shut down each application, allowing any memory-resident data to be written to disk. Once it’s ready to shut down, the operating system flushes the disk cache, to ensure that no information is lost, and then tells the hardware to turn off. During the boot process, a CLEAN COPY of the operating system is loaded from disk in to memory. Each hardware driver is loaded and started clean. Applications that may have been running for days or weeks are loaded cleanly from disk.
A full restart loads everything cleanly. Any remanent junk sitting around in cache is erased. Anything sitting in the swap file is erased (or more specifically, ignored). An application that may have been slowly growing in memory, getting slower and slower, is now loaded clean.
The other advantage to periodically doing a full restart, is that it gives Windows Updates, and other types of patches and updates, an opportunity to complete the installation process. Often, even though the update runs, it isn’t complete until a full restart occurs.
Windows 7
- Click the start button
- Click the tiny arrow next to “Shut down” or “sleep” on the start menu.
- Click “Restart”
Windows 8
- Yell loudly at your monitor: “WINDOWS SHUT DOWN”
- Wave your hand in front of the monitor, and say “YOU WILL shut down.”
- Scribble your mouse around wildly, to see if a “shutdown menu” pops up.
- When none of that works, try this instead:
- Press Windows+R to get to the Run box
- Type “shutdown /t 0 /f /s” (Note the spaces: /t^0^/f^/s Also, the “0” is a zero, not the letter)
- Click OK
(You know, because some complex, obscure command is far superior than being able to select “full shutdown” from a menu — people love complex, obscure commands!)
Don’t Run Software You Don’t Recognize
If some website asks you to install “a special player” so that you can listen to music or watch a movie, that’s a GOOD INDICATOR that the “special player” is a virus or malicious software, or will bring malicious software with it!
Rule of thumb: When the box asks, “Do you wish to install…..” CLICK NO!!
Once per Month, Create a Restore Point
A restore point is a snapshot of your operating system, drivers, and settings.
If your computer starts acting weird later, or starts having stability issues, you can go back to a “Restore Point” — a point in time where everything WAS working properly.
Some events, such as Windows Update, automatically trigger a Restore Point, but creating a “Manual” restore point on a monthly basis, is cheap insurance to make sure something you install later, won’t damage the operating system or create stability issues. (If so, you can simply revert to a restore point)
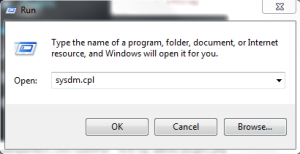
- Windows+R to get to the Run dialog
- Type “sysdm.cpl” and click OK
- This will bring up the “System Properties” dialog
- Click the “System Protection” tab
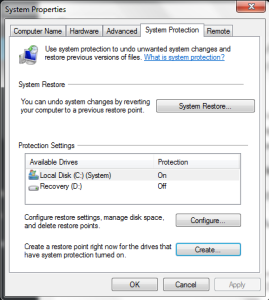
- At the bottom, click “Create”
- Enter a name for the restore point – such as “Things look OK in July!”
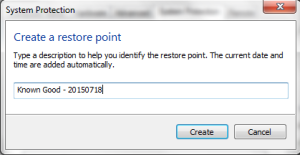
- The restore point takes a few minutes to create…

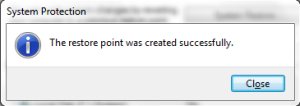
- A message will be displayed, indicating that the restore point has been completed. Click “Close” then “OK”
Conclusion
Performing a tech checkup on your Windows computer, at least twice a year, ensures that you will continue to enjoy good stability and performance, and will extend the life of your investment.
Even with XP, an older operating system, it’s not too difficult to clean things up, and get your PC running properly again.
For any Windows system:
- Perform a Disk Cleanup, using Disk Cleanup tool (cleanmgr). Don’t forget to clean up XP’s temp files manually.
- Check for Malware and Viruses (mrt).
- Run Windows Update, and make sure everything installs properly. Install Optional updates, to get newer hardware drivers, but avoid “Bing Desktop” and “Skype Desktop” unless you actively already use these features.
- Update virus protection, and make sure that its automatic update feature is working properly.
- Update your video driver. For systems with nVidia or ATI graphics, this is done through the respective control panel.
- Defragment your hard drive (dfrgui).
- Follow best practices when using Windows, to make sure your computer continues to run well.